Legacy Course: Test Your Mettle
Rees Jones designed the Legacy Course in 2000 with a slope of 146 and a routing that never lets you settle into a rhythm. Tight corridors demand accuracy off the tee. Strategic bunkering makes you think through that approach. At 7,151 yards with a course rating of 74.7, it builds pressure that separates the patient players from the rest.
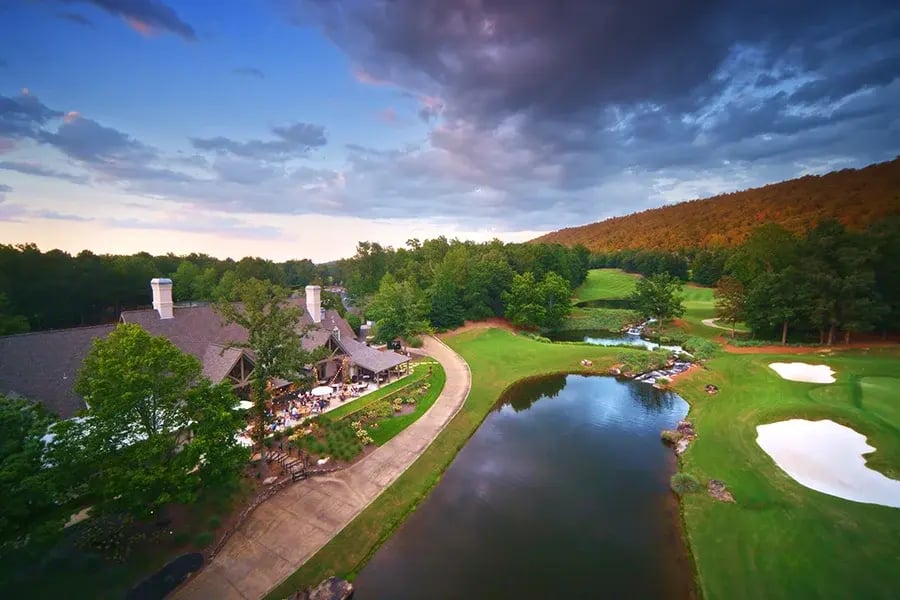
Precision Challenge
The Legacy Course is the perfect complement to the Founders Course.
Carved into the valley below Double Oak Mountain, its retreat-like setting weaves through rolling hills, quiet lakes, and some of the most scenic terrain at Greystone. While the Founders Course moves naturally through the Appalachian foothills, Legacy asks for a more deliberate style of play.
A winding creek shapes the outward nine, water comes into play on the dramatic finishing hole, as it cascades down to the waterfalls below. Beautiful in its setting and exacting in its design, Legacy challenges players to think their way through every round.
Legacy Course Hole Tour
Use dropdown to choose hole:
Dropdown
Home
The Legacy course is the perfect running mate to the Founders course. Situated three miles from the Founders Course, the retreat-like setting gives the impression that you have magically stumbled upon a Greystone secret. Carved into the valley of Double Oak Mountain, the Legacy course features placid lakes, rolling hills, and wandering streams that wind throughout the entire course.
Like the Founders Course, the Legacy offers 5 sets of tees for members ensuring a wonderful experience for all levels of golfers. Designed by legendary architect, Rees Jones, members will find this course as challenging as it is playable, leaving them a difficult choice over which course is their favorite. Luckily at Greystone, you don’t have to choose!
Hole #1
Hole Overview
A beautiful starting par 4.
How to Play
A tee shot in the center or left side of the fairway will leave you a mid to short iron onto the green which has two tiers and deep bunkers right and left. Club selection will be important, especially when the pin is back.
Hole #2
Hole Overview
Water, water everywhere.
How to Play
This green is 25 yards deep and most players have a short to mid iron shot. There is room to miss the green long if you hit too much club, but the pitch shot back towards the water can be rather intimidating.
Hole #3
Hole Overview
This first of Legacy’s strong par 5s.
How to Play
Avoid the bunkers along the right side. Judging distance on your approach to the green is difficult because of the creek and bunker complex around the green. Toughest pin position is on the left side behind the bunker.
Hole #4
Hole Overview
A beautiful starting par 4.
How to Play
A tee shot in the center or left side of the fairway will leave you a mid to short iron onto the green which has two tiers and deep bunkers right and left. Club selection will be important, especially when the pin is back.
Hole #5
Hole Overview
A chance to make birdie or double bogey.
How to Play
Tee shots between the bunkers will leave a mid to short iron to a green guarded by a creek around the front and right and a bunker left. Toughest pin is back left on the shelf.
Hole #6
How to Play
The tee shot must be in the center left side of the fairway, otherwise you are blocked by trees for your second shot. A lay-up even with the first bunker will leave you with about 80-90 yards to a large green. A back right pin over the bunker presents a challenge.
Hole #7
How to Play
Play this hole wisely. Lay-up off the tee to about 80-100 yards. Leave yourself a full wedge uphill to a green with bunkers front and right. A pin tucked at the front right of the green will require some precise wedge play to get the ball close.
Hole #8
Hole Overview
A picturesque par 3 you can’t afford to miss right, left or long.
How to Play
Pins in the back right and left near the bunkers present the toughest tests.
Hole #9
Hole Overview
A great finish to the front nine, this hole doglegs slightly to the right.
How to Play
Favor the left center of the fairway off the tee. Hit a mid to long iron into this large green divided by a swale that sits left of center. The toughest pin position is back left.
Hole #10
Hole Overview
A great driving hole with a demanding second shot especially if the pin is placed left over the bunker.
How to Play
Tee shots favoring the center and right side will provide a better approach to the green which is slightly elevated and falls off around the back.
Hole #11
Hole Overview
Trouble lurks along the entire right side of this long, narrow par 5. There is more room in the landing area than appears.
How to Play
Second shots up the left side to about 100 yards leave a full wedge to a green bordered by bunkers. Toughest pins are in the back and left. Going over this green is not an option.
Hole #12
Hole Overview
A long, uphill par 4.
How to Play
Your approach shot will be to a green that appears very narrow. Shots missed in the right bunker or to the right of the bunker will be very difficult to get up and down. Par is a great score.
Hole #13
Hole Overview
The green on this hole has three distinct levels.
How to Play
A shot which stops on the correct level could result in a birdie. Shots on the wrong part of the green will require some skillful putting. There is more room on the left side of the green than it appears.
Hole #14
How to Play
Avoiding the bunkers off the tee is the first challenge on this downhill par 4. A greenside lake right and a large bunker left await errant shots. The green is long and narrow and angles back to the right. A back right pin is very challenging.
Hole #15
Hole Overview
You can’t afford to miss the fairway on this good driving hole.
How to Play
Use a mid to short iron on the second shot. The green has a large swale in the middle. The left front half of the green is guarded by a large bunker. Toughest pin location is back left.
Hole #16
How to Play
Go with a seven-iron or less into this large green for a good chance at birdie. There is a ridge running through the middle of the green that poses a problem for longer putts. Toughest pin position is front right, tucked over the bunker.
Hole #17
How to Play
Club selection is a challenge on this downhill par 3 which can play over 200 yards from the back tees. A good shot is rewarded with a birdie opportunity, but shots long and left present a tough up and down.
Hole #18
Hole Overview
This par 5 is a three-shot hole for most players.
How to Play
For longer hitters, going for the green on your second shot requires a well-struck long iron or fairway metal. This small green has water in front. A great finishing hole for a great golf course.
In Their Own Words
"The Founders Course at Greystone is a gem, and the Legacy Course might be even better.
The Club is first-rate with everything they do."
—Wayland Abernathy, III, [Greystone Member]
Make It Your Home Course
With membership at Greystone Golf & Country Club, the Legacy Course, the Founders Course, and the community that brings them to life are yours to enjoy year-round.