Founders Course: Demand Your Best
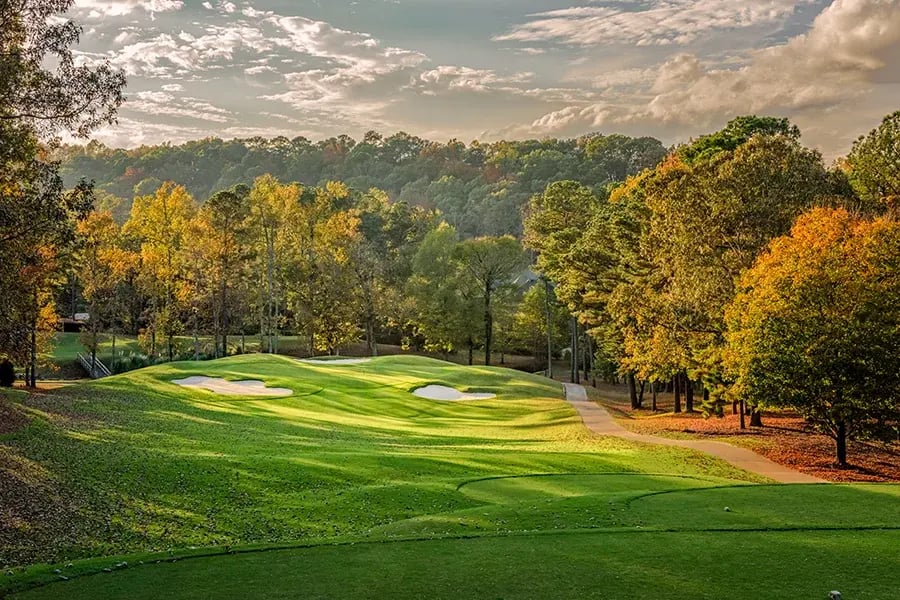
The Founders Course stays with you. A Top-10 Alabama course and home of The Tradition, Bob Cupp's 7,299-yard design travels through the Appalachian foothills, demands patience, rewards precision, and delivers a round that is worth revisiting.
Shaped by Terrain
Bob Cupp designed the Founders Course in 1991 rooted in the natural terrain:
Tree-lined fairways, Appalachian foothills, and elevation changes make every round different. Creeks wind through several holes. The back nine tightens considerably. It's the kind of course that reveals itself slowly.
At 7,299 yards with a course rating of 75.1, it rewards course management over power.
Legacy Course Hole Tour
Use dropdown to choose hole:
Dropdown
Home
The Founders course is a majestic golf course that plays host to the Regions Tradition PGA Champions Tour each spring. Designed by Bob Cupp in 1991, it’s a golf experience fit for the pros, and with five sets of tees, players at every level will enjoy their round.
Tree-lined fairways put a premium on accurate tee shots and while the course meanders through the Appalachian Mountain foothills, even the most ardent player must stop and soak in all that the terrain has to offer. Bermuda-grass fairways and Champion Bermuda-grass greens provide a welcomed combination of surfaces from which to play.
Hole #1
Hole Overview
A great opening hole. The fairway is generous, but bunkers on the left pinch the landing area.
How to Play
Drives played away from the bunkers risk running over the mounds and down to a creek. Missing the green left with a left-side pin will leave the player with a difficult up-and-down.
Hole #2
Hole Overview
A more generous driving area than appears off the tee.
How to Play
A long drive up the right side of the fairway leaves better players the option of getting home in two. Most players will lay up even with the middle bunker, about 100-120 yards to the green. The toughest pin placements are in the back.
Hole #3
Hole Overview
Greystone’s toughest hole requires an accurate drive up the fairway. The right side is guarded by a creek which starts at the landing area and feeds into a lake fronting the green.
How to Play
Club selection is critical for your approach to the green which runs back at an angle.
Hole #4
Hole Overview
A great par 3 with water left and bunkers on the back right.
How to Play
The tee boxes aim you toward the bunkers. A well-struck shot to the center of the green will leave you with a medium-length birdie putt to most pins. Par is a great score.
Hole #5
Hole Overview
This long par 5 requires three well-struck shots.
How to Play
A common play is using the three wood off the tee and for the second shot. A ball caught in the rough on the left-side slope presents an awkward third shot. The toughest pins are on the left shelf of the green.
Hole #6
Hole Overview
A straight-forward par 4.
How to Play
Good drives leave a medium-to-short iron onto one of the longest greens on the course. Club selection can vary from three to four clubs; front to back of the green. The bunker to the right of the green is very much in play.
Hole #7
Hole Overview
This fairly benign looking hole plays longer for most players.
How to Play
The biggest challenge is to hit enough club to get to the back right pins. The left bunker and long left are certain bogeys. Any ball above the hole when the greens are fast can be real trouble.
Hole #8
Hole Overview
A good birdie opportunity on this great hole depending on where you drive the ball.
How to Play
A good drive leaves you on a medium to short-iron and a chance for birdie if the pin is on the front half of the green.
Hole #9
Hole Overview
This long, slightly uphill par 4 provides a great finish to the first nine. The small green is severely sloped from back to front with a “false front.”
How to Play
Club selection is critical for your approach. Balls hit over the green are almost impossible to get up and down.
Hole #10
Hole Overview
The tenth green is divided into two distinct levels.
How to Play
The key is to put your ball on the same level as the pin. Pin placements on the left side over the bunker and deep left are especially tough. Going over the green leaves difficult up-and-downs.
Hole #11
How to Play
Pay special attention to hitting the tee shot in the fairway with bunkers on the right and a creek running along the left side. The second shot is uphill to a terrace splitting the green in half. Toughest pins are left over the bunker on the lower terrace.
Hole #12
Hole Overview
The green is split from front to back by a berm; a shot on the wrong side of the berm from the pine leaves a difficult two-putt.
How to Play
A deceiving dogleg left. Cutting the dogleg too close results in a shot from the rough that may carry down to a small creek.
Hole #13
Hole Overview
A birdie opportunity with two well-struck shots on this reachable par 5.
How to Play
Putts from the middle-right of the green to a back-right pin will break away from the water.
Hole #14
Hole Overview
Greystone’s signature hole! This beautiful par 3 is slightly downhill.
How to Play
Any shots above the green to the left present a difficult up and down. Balls landing on the green on the left slope will feed down to the middle.
Hole #15
Hole Overview
A challenging par 5 that can play very long from the back tees.
How to Play
Two well-placed shots leave you with a short-iron. The creek running along the left side comes into play on the second and third shots. Accuracy is needed for shots to the back pins.
Hole #16
Hole Overview
This hole has two distinct personalities.
How to Play
Back tees require a well-placed drive up the right center with a mid-iron to the green. Tees in front of the water allow the player to hit around the corner with a short-iron onto the large green. The front bunker is a certain bogey.
Hole #17
Hole Overview
A great downhill par 3.
How to Play
Club selection is important when the wind is blowing around this elevated tee. The surrounding slopes make this green difficult to read. An easy par or a difficult birdie hole.
Hole #18
Hole Overview
A great finishing hole that requires three well-placed shots.
How to Play
A creek borders the fairway on the right, then crosses it and runs along the left to the green. Shoot for the middle of this small green unless you are trying for birdie. Putts from above the hole are very fast.
In Their Own Words
"I played in the member-guest tournament at Greystone for seven years.
I saw firsthand what a wonderful club it is. The beautiful courses and friendly people opened my eyes to the Greystone community."
—Richard Britt, [Greystone Member]
Play the Course. Join the Club.
One of Alabama’s finest courses feels even better when it’s your home club. Discover what effortless membership looks like.